Sarah Mitchell
Operations Manager
How to Prepare Your Home for Flooring Installation
We have been installing floors across the Lehigh Valley and northern New Jersey for a long time now. And if there is one thing that separates a smooth install from a painful one, it is not the material, the tools, or even the crew. It is what happens before we show up.
Prep work is the boring part. Nobody posts about it on Instagram. But every single installer on our team will tell you the same thing: the homes that are ready when we walk through the door on Monday morning get better results, faster timelines, and fewer surprise charges on the final bill.
This guide covers everything you need to do before installation day. We are not going to sugarcoat it — some of this is actual work. But it is worth every minute.
Why Prep Day Matters More Than Install Day
Here is a bold take: your prep day determines about 70 percent of how your install goes. We can show up with the best crew, the sharpest blades, and top-shelf hardwood planks — but if the room is packed with furniture, the subfloor is a mess, and your material has been sitting in the garage at 40 degrees, we are already behind.
A client in Morristown forgot about their closets — seven closets, all packed to the ceiling. That ate up half the first day. We had nowhere to stage material, nowhere to set up the saw, and our guys were stepping over boxes of Christmas decorations in February. The actual flooring work? Flawless. But the project ran a full day over schedule because the house was not ready.
Compare that to a job we did in Bethlehem last fall. The homeowner had every room cleared out, furniture stacked neatly in the garage, baseboards already pulled and labeled in ziplock bags by room. The luxury vinyl plank had been acclimating in the living room for three days. We walked in, got straight to work, and finished a day ahead of schedule. She even left us coffee and donuts. That woman is a legend.
The Furniture Situation (Please, Move It Early)
Your installer loves you. But not enough to move a piano on install day.
This is the single biggest prep task, and it is the one people underestimate the most. You need to get everythingout of the rooms that are getting new flooring. Not pushed to one side. Not "mostly cleared." Gone.
Here is what needs to move:
- All furniture — couches, tables, chairs, bed frames, dressers, desks
- Everything inside closets if the flooring extends into them (it usually does)
- Area rugs and rug pads
- Floor lamps, plant stands, and anything sitting on the floor
- Wall-mounted TVs if they are low enough that our work might bump them
- Fragile items on shelves — the vibration from nail guns and saws travels through walls
We showed up to a job in Allentown last spring and the homeowner's Great Dane was running loose through the work area. The dog knocked over our miter saw, stepped in a tray of adhesive, and then tracked it across the kitchen tile that was not being replaced. That was a fun morning. But more on pets in a minute.
For the furniture, you have a few options:
- Move it to rooms that are not being worked on. This is free and works great if you are doing one or two rooms at a time.
- Rent a portable storage container. Companies like PODS or U-Pack will drop one in your driveway. Worth it for whole-house installs.
- Ask your installer to handle it. We will do this if you arrange it ahead of time, but we charge for the labor. It is not cheap because it is not what our guys are there to do.
Pro tip: Start moving furniture at least two to three days before install day. Doing it the night before at 11 PM leads to rushed decisions, scratched walls, and things getting shoved into rooms that block hallways our crew needs to use.
One more thing — disconnect and move any electronics. Computers, gaming consoles, sound systems. Sawdust gets into everything. If you have a home office in the room we are working on, that laptop needs to be somewhere else.
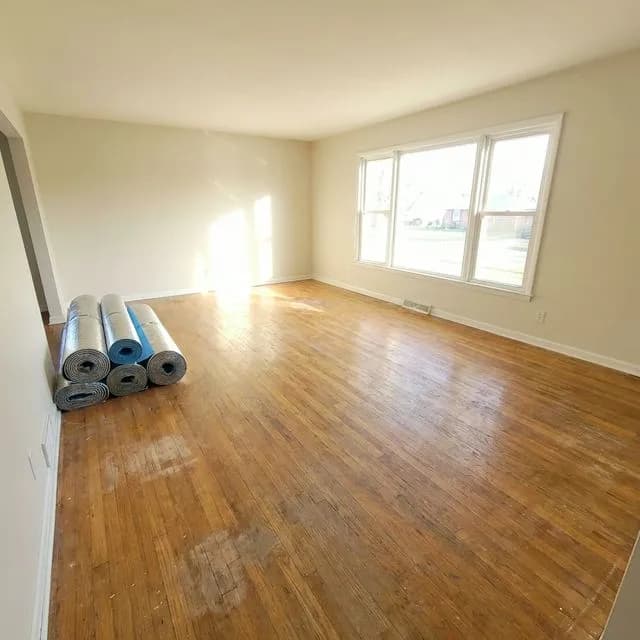
Material Acclimation — Don't Skip This
This is the part where homeowners roll their eyes. We get it. You just had a few thousand dollars worth of flooring delivered, and it is sitting in boxes in your living room taking up space. You want it installed yesterday.
But here is the deal: hardwood flooringis a natural product. It expands and contracts with temperature and humidity. If you install planks that have been sitting in a cold warehouse or a hot delivery truck, they are going to change size once they settle into your home's environment. That means gaps in winter. Buckling in summer. And a flooring failure that could have been avoided by following acclimation guidelines.
Here are the general acclimation timelines we follow:
- Solid hardwood:3 to 5 days minimum, sometimes longer depending on the species and your home's humidity levels
- Engineered hardwood: 48 hours in most cases
- Luxury vinyl plank (LVP): 48 hours — LVP is more dimensionally stable than wood, but it still needs to adjust
- Laminate: 48 hours, unopened boxes laid flat in the room
- Tile: No acclimation needed — tile does not care about your thermostat
We had a homeowner in Easton who stored their solid oak planks in an unheated shed for two weeks before install. It was January. Those boards were basically ice. We had to delay the job by four days while the wood came up to room temperature. Four days of staring at boxes and waiting. Do not be that person.
Baseboards and Trim: Remove or Leave?
This one comes up on every single job. The short answer: it depends on what look you want and how much you want to spend.
Option A — Remove baseboards before install. This gives the cleanest result. We install the flooring right up to the wall, then you (or we) reinstall the baseboards on top. No quarter-round needed, clean lines, looks like a high-end job. Because it is.
Option B — Leave baseboards in place. We install up to the baseboard and add quarter-round or shoe molding to cover the expansion gap. This is faster and cheaper but gives you that extra piece of trim at the bottom of the wall. Some people do not mind it. Some people hate it. Strong feelings on both sides.
If you are removing baseboards yourself, here is how to do it right:
- Score the paint line between the baseboard and the wall with a utility knife — this prevents tearing the drywall paper
- Use a thin pry bar and a putty knife behind it to protect the wall
- Work slowly from one end to the other, prying a little at each nail
- Number each piece on the back with a marker and note which wall it came from — "Living Room, North Wall, Piece 3"
- Pull any remaining nails out through the back side to avoid splitting the face
- Stack them flat somewhere safe and dry
If your baseboards are old, painted over six times, and crumbling when you look at them wrong — this might be a good time to budget for new ones. We see this a lot in older homes around Bucks County and Bergen County. The original trim from the 1960s was never meant to be removed and reinstalled. Sometimes it is cleaner (and honestly cheaper in the long run) to just start fresh with new baseboard.
Also worth noting: if you have carpet being replaced with hard flooring, there is often a tack strip and staples underneath that baseboard. We handle that during install, but removing the baseboard gives us much better access to clean everything up properly.
Pets, Kids, and the Noise Factor
Let us talk about the elephant in the room. Or the Great Dane, as the case may be.
Flooring installation is loud. We are talking nail guns, miter saws, table saws, hammering, scraping old adhesive, ripping up tack strips. It is not gentle background noise. It is construction. For hours. For days, depending on the project size.
Pets:Get them out of the house. Full stop. Dogs bark at everything, get stressed by loud noises, and want to investigate every single thing we are doing. Cats hide and then bolt for an open door when you least expect it. We have had two cats escape during installs — one in Bethlehem and one in Bergen County. Both were found (one was up a tree, the other was under the neighbor's deck), but the stress is not worth it. Board them, send them to a friend, or set them up in a completely sealed-off room on the opposite side of the house with their food, water, and litter.
Kids: Use your judgment, but small children and power tools in the same space is a bad combination. If your kids are school age and gone during the day, great. If you have a toddler at home, plan to be out of the house or have a dedicated adult keeping them far from the work zone. Our guys are careful, but sawdust, sharp edges, and exposed nail heads are not toddler-friendly.
Working from home:If you think you are going to hop on a Zoom call while we are running a table saw in the next room, think again. We have had people try. It does not work. If you work remotely, plan to work from a coffee shop, a library, or a friend's place on install days. The noise is constant and it is loud.
HVAC and Climate Control
This is the section most people skip. And then they wonder why their brand new hardwood floors have gaps you could fit a nickel into by March.
Wood moves. Even engineered wood moves. Temperature and humidity swings are the enemy of a good flooring installation. Here is what we need from you:
- Keep your HVAC running at normal living temperature — somewhere between 65 and 75 degrees Fahrenheit — for at least one week before installation and throughout the entire install
- Humidity should stay between 35 and 55 percent. Buy a cheap hygrometer from any hardware store. If you are below 35 percent (common in Lehigh Valley winters), run a humidifier. If you are above 55 percent (common in New Jersey summers), make sure your AC or a dehumidifier is handling it
- New construction or major renovation? All wet work (drywall mud, paint, plaster) must be completely dry before flooring goes in. This means the HVAC needs to have been running for at least a week, ideally two, after the last wet trade finishes
- Do not turn off the heat to "save money" during install. We see this one in the late fall. Homeowner figures the house is empty, might as well save a few bucks. Then the temperature drops to 50 degrees overnight and the adhesive does not cure right. Bad idea
For luxury vinyl plank and laminate, temperature control is slightly less critical than it is for solid hardwood, but it still matters. LVP can warp or tent if it gets too hot, and laminate joints can push apart in very dry conditions.
Read our hardwood floor maintenance guide for long-term climate control tips once your floors are in. Keeping the right environment is not just an install-day thing — it is a forever thing.
Setting Realistic Timeline Expectations
"How long is this going to take?" It is the first question everyone asks, and the honest answer is: it depends on a bunch of stuff.
Here are some rough timelines based on what we typically see:
- Single room (bedroom, office): 1 day for most materials
- Living room and dining room combo: 1 to 2 days
- Whole first floor, open concept: 2 to 4 days depending on material and layout
- Full house (multi-level): 5 to 10 days, sometimes more for large homes
- Tile work: Add extra time for mortar setting, grouting, and curing — tile is the slowest flooring to install
These timelines assume the home is prepped and ready. If we show up and need to spend a half day moving furniture, pulling baseboards, or waiting for material to finish acclimating, add time to every estimate above.
Things that slow down an install:
- Subfloor problems. Squeaky spots, rot, uneven surfaces — all of these need to be addressed before the new flooring goes down. We cannot just cover up a bad subfloor and hope for the best. Check our guide on why flooring quotes vary for more on this
- Pattern layouts. Herringbone, chevron, diagonal patterns — they look amazing but take significantly longer to install than a straight lay
- Stairs. Every staircase adds time. Treads, risers, nosings — it is detailed work and you cannot rush it
- Transitions between rooms. Different flooring heights, doorways, thresholds — each one needs to be handled individually
- Old flooring removal. If we are tearing out existing floor first, that is a project in itself. Glue-down hardwood and old tile are the worst offenders
Here is something nobody tells you: the last 10 percent of an install takes 30 percent of the time. That is where we are doing detail work around door frames, closets, vents, and transitions. It is the part that makes your floor look professional instead of DIY. Do not rush your installer through it.
We always give our clients a timeline range, not a single number. If we say three to four days, plan for four. If we finish early, great — you get your house back sooner. If it runs to the edge of the estimate, you are not stressed about it.
Frequently Asked Questions
How far in advance should I start preparing for flooring installation?
Give yourself at least a week. You want time to move furniture, clear out closets, handle any subfloor issues, and let your new material acclimate to the room temperature. Rushing the prep almost always leads to delays on install day. If you have a large home or multiple rooms, two weeks is even better.
Do I need to remove all my furniture before the installers arrive?
Yes — ideally everything should be out of the rooms getting new flooring before our crew shows up. We can help move a few heavy pieces if we discussed it ahead of time, but that adds labor hours to your bill. Dining tables, couches, bookshelves, dressers, beds — all of it needs to go to another room, the garage, or a portable storage unit.
Should I remove baseboards myself or let the installer do it?
Either way works, but doing it yourself saves you money. If you are comfortable with a pry bar and a little patience, pull them off, label the back of each piece with its location, and set them aside. If your baseboards are painted over or nailed in tight, it might be worth having us handle it so nothing cracks. We are happy to do it — just know it adds time to the project.
Can my pets stay home during flooring installation?
We strongly recommend sending pets to a friend's house, doggy daycare, or a boarding facility for the duration of the install. The noise from saws, nail guns, and hammering stresses most animals out. Open doors create escape risks. And pet hair floating into wet adhesive or fresh finish is a real problem. A couple of days away is the kindest thing you can do for them.
How long does flooring material need to acclimate before installation?
It depends on the material. Solid hardwood needs at least 3 to 5 days sitting in the room where it will be installed. Engineered hardwood is usually 48 hours. Luxury vinyl plank needs about 48 hours as well. Laminate is typically 48 hours. We will give you exact timing when you book your install, but do not skip this step — it prevents gaps, buckling, and problems down the road.
What should I do about my HVAC system before flooring installation?
Keep your HVAC running at normal living temperature for at least a week before install and throughout the entire process. That means somewhere between 65 and 75 degrees Fahrenheit with humidity between 35 and 55 percent. If you just moved into a new build or a renovation where the HVAC was not running, let the system stabilize the environment for a full week before we show up. Temperature swings mess with wood and adhesive in ways that cause problems months later.
About the Author
Operations Manager
Sarah keeps the trains running. She joined the company in 2016 after a decade managing logistics for a regional building materials distributor. She coordinates every project from initial estimate thro...
You Might Also Like
How Much Does Flooring Installation Cost in 2026? Complete Price Guide
Tired of vague price ranges from sites that have never swung a hammer? Here are real, local flooring costs pulled from p...
Read: How Much Does Flooring Installation Cost… MaintenanceHow to Maintain and Protect Your Hardwood Floors
Most hardwood damage we see isn't from age — it's from bad cleaning habits and ignored humidity. Here's the exact care r...
Read: How to Maintain and Protect Your Hardwoo… Cost GuideWhy Your Flooring Quote Varies: What Goes Into Pricing
You called three companies and got three wildly different numbers. Before you pick the cheapest one, let us show you wha...
Read: Why Your Flooring Quote Varies: What Goe…