Danny Reyes
Lead Installer — Hardwood Specialist
Subfloor Preparation: What Installers Check Before Your New Floor
The subfloor is the foundation of every flooring project, and it is the part that homeowners almost never think about. When we show up to a job in Lehigh Valley or northern New Jersey, the first thing we do is inspect the subfloor. Not the old flooring, not the room dimensions, not the material the homeowner picked. The subfloor. Because a beautiful floor installed over a bad subfloor will fail. It is not a matter of if. It is a matter of when.
This guide covers exactly what professional installers check before laying a single plank, tile, or carpet square, and why it matters for the life of your new floor.
Why Subfloor Prep Is the Most Important Step
Your flooring is only as good as what is underneath it. A $15-per- square-foot engineered hardwood installed over an uneven, moisture- damaged subfloor will perform worse than a $6 LVP installed over a properly prepared one. Every click-lock joint, every glue bond, every nail hold depends on the subfloor being flat, dry, clean, and structurally sound.
The most common callback we get is for flooring that feels hollow, pops, creaks, or has visible gaps. In 90% of those cases, the problem traces back to subfloor prep that was skipped or done poorly. This is not a step you can shortcut. It is the step that determines whether your floor lasts 5 years or 25.
The Flatness Check: 10-Foot Straightedge Test
The first thing we do on every job is check the subfloor for flatness. We lay a 10-foot aluminum straightedge across the floor in multiple directions and measure any gaps underneath with a ruler or feeler gauge.
Industry standards are clear:
- Most flooring (LVP, hardwood, laminate, carpet): Maximum 3/16 inch deviation over 10 feet
- Large-format tile (12x24 and larger): Maximum 1/8 inch deviation over 10 feet
- Glue-down flooring: Maximum 3/16 inch, but flatter is always better for adhesion
If the subfloor is out of tolerance, we fix it before installing anything. High spots get ground or sanded down. Low spots get filled with floor-leveling compound. Severely uneven concrete slabs get a full self-leveling pour. This is not optional. Skipping this step leads to every problem listed above.
Moisture Testing: The Invisible Threat
Moisture is the number one subfloor problem in PA and NJ, and it is almost always invisible. A concrete slab can look and feel bone dry while transmitting enough moisture to destroy any flooring installed over it. Plywood subfloors above damp crawl spaces absorb moisture that you cannot see or feel.
We test every subfloor for moisture. Here is what we use:
Concrete Subfloors
We perform a calcium chloride test (ASTM F1869) on concrete slabs. A small dish of calcium chloride is sealed under plastic on the slab for 72 hours. The weight gain indicates the moisture emission rate. The threshold for most flooring is 5 pounds per 1,000 square feet per 24 hours. Above that, we either apply a moisture mitigation system or wait for the slab to dry further.
For faster results, we also use a pin-type moisture meter as a preliminary screening tool. But the calcium chloride test is the definitive standard, and every flooring manufacturer requires it for warranty compliance.
Plywood Subfloors
We use a pin-type moisture meter inserted into the plywood at multiple locations. The reading should be below 12% for most flooring installations. Readings above 14% indicate an active moisture source that needs to be addressed before installation. In homes across Bethlehem and Easton with older crawl spaces, we find elevated plywood moisture regularly. The fix is usually improving crawl space ventilation or adding a vapor barrier below.
Common Subfloor Problems We Find in PA and NJ Homes
The Lehigh Valley and northern NJ housing stock ranges from 1920s row homes to 2020s new construction. Each era brings its own subfloor challenges. Here are the most common issues we encounter.
Uneven Concrete Slabs
Concrete slabs in basements and slab-on-grade homes are rarely flat enough for direct flooring installation. We find dips, humps, and ridges on almost every slab we test. The fix is grinding high spots with a concrete grinder and pouring self-leveling compound over low spots. A full self-leveling pour costs $3 to $5 per square foot but creates a perfectly flat surface for any flooring type.
Rotted or Water-Damaged Plywood
In older homes, especially around bathrooms, kitchens, and exterior walls, we find plywood subfloor that has been exposed to water and is soft, spongy, or visibly discolored. This plywood cannot support new flooring and must be cut out and replaced. We cut back to the nearest floor joists, install new 3/4-inch plywood, and screw it down securely. This repair typically costs $3 to $6 per square foot for the affected area.
Squeaky Subfloors
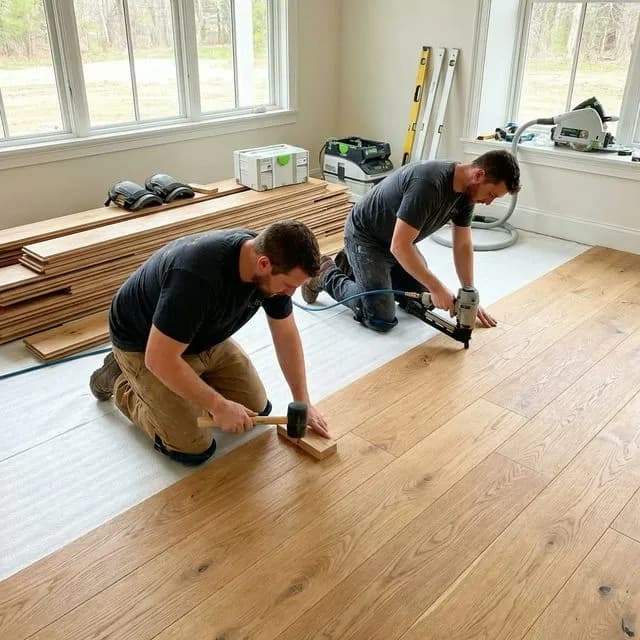
Squeaks happen when the plywood subfloor is not tightly secured to the floor joists below. The plywood moves slightly when you walk on it, rubbing against the nails and creating noise. We fix this by driving screws through the plywood into the joists at 6-inch intervals. Construction adhesive between the plywood and joists eliminates squeaks permanently. If you are installing hardwood or any nail-down flooring, fixing squeaks before installation is essential because you cannot access the subfloor afterward.
Old Adhesive Residue
When we pull up old vinyl, linoleum, or glue-down carpet, there is almost always adhesive residue left on the subfloor. This residue must be removed or addressed before new flooring goes down. For concrete slabs, we use a floor scraper and adhesive remover. For plywood, we sand it smooth. Some old adhesives (pre-1980s) may contain asbestos, in which case we follow PA and NJ DEP protocols for safe handling.
OSB Instead of Plywood
Some builders used OSB (oriented strand board) as a subfloor instead of plywood. OSB is acceptable for most flooring installations, but it holds nails and staples less securely than plywood and swells more when exposed to moisture. For nail-down hardwood over OSB, we use a cleat nailer at tighter spacing and verify the OSB is at least 23/32 inch thick. If the OSB shows any swelling or delamination, we replace it.
Subfloor Requirements by Flooring Type
Different flooring materials have different subfloor requirements. Here is what we check for each type.
Hardwood (Solid and Engineered)
Requires a clean, flat, dry subfloor. Solid hardwood must go over plywood (minimum 3/4 inch) and cannot go over concrete. Engineered hardwood can go over plywood or concrete. Moisture readings must be below 12% for plywood and below 5 lbs/1000sqft for concrete. Flatness tolerance is 3/16 inch over 10 feet.
Luxury Vinyl (LVP and LVT)
LVP and LVT are more forgiving but still require a flat, clean subfloor. Because vinyl is thin and flexible, it telegraphs every bump and dip underneath. We often do more patching and leveling for LVP than for hardwood because the thinner material shows subfloor imperfections more readily. Moisture is less of a concern since vinyl is waterproof, but we still test because moisture trapped beneath vinyl can cause mold growth.
Tile
Tile has the strictest subfloor requirements. The subfloor must be extremely rigid (no flex) and flat to 1/8 inch over 10 feet for large-format tiles. Over plywood, we install cement backer board or use an uncoupling membrane (like Schluter DITRA) to prevent cracks. Over concrete, we can tile directly as long as the slab is flat and dry.
Carpet
Carpet is the most forgiving flooring for subfloor imperfections because the pad absorbs minor unevenness. However, the subfloor still needs to be structurally sound, dry, and free of protruding nails or screws. We check for and fix squeaks before carpet installation because the pad and carpet will not eliminate them.
What Subfloor Prep Costs (And Why It Is Worth It)
Subfloor prep is one of the most common reasons flooring quotes vary between contractors. Some include it, some do not, and some skip it entirely. Here are the real costs we charge in our market:
- Minor leveling and patching: $1 to $2 per square foot
- Self-leveling compound pour (concrete): $3 to $5 per square foot
- Plywood replacement (rotted sections): $3 to $6 per square foot of affected area
- Squeak repair (screwing down plywood): $0.50 to $1 per square foot
- Adhesive removal: $1 to $3 per square foot depending on adhesive type
- Moisture mitigation system (concrete): $2 to $4 per square foot
For a 500-square-foot room with moderate subfloor issues, prep typically adds $500 to $1,500 to the project. It is real money. But skipping it costs more in the long run because the floor fails and you pay for installation twice. We have fixed enough of those situations to know that proper prep pays for itself every time.
What to Expect During Your Project
When you hire us for a flooring project in Lehigh County, Northampton County, or Bucks County, subfloor prep is part of our standard process. During the in-home estimate, we do a preliminary subfloor assessment. On installation day, we do a thorough inspection after removing the old flooring and before laying anything new.
If we find issues that were not visible during the estimate (hidden under old flooring), we call you immediately, explain the problem, and give you a cost to fix it before proceeding. No surprises. No guessing. Just honest communication and the right prep work so your new floor lasts as long as it should.
Schedule a free in-home estimate and we will assess your subfloor condition as part of the consultation.
About the Author
Lead Installer — Hardwood Specialist
Certified: NWFA, EPA RRP
Danny has been with VM Power since 2014 and leads our hardwood division. He specializes in wide-plank installations and custom patterns — herringbone, chevron, borders — the work most crews won't touc...
You Might Also Like
Why Your Flooring Quote Varies: What Goes Into Pricing
You called three companies and got three wildly different numbers. Before you pick the cheapest one, let us show you wha...
Read: Why Your Flooring Quote Varies: What Goe… InstallationHow to Prepare Your Home for Flooring Installation
Every week we show up to a home where the living room is still full of furniture and the dog is loose. Here's everything...
Read: How to Prepare Your Home for Flooring In… InstallationFlooring Installation Timeline: What to Expect Day by Day
Wondering how long your flooring project will take? We walk through the complete installation timeline day by day — from...
Read: Flooring Installation Timeline: What to …